I think that English Toffee is the easiest candy ever to make. It's very impressive to give, even though you can make it in less than a half hour.
Just out of curiosity I tried a couple no thermometer recipes I saw on Pinterest. They were disasters, the whole lot of them. Seriously the only way to guarantee a delicious batch is to use a thermometer.
It's simple and takes the guesswork out of it.
English Toffee
Ingredients
1 cup salted butter ( no substitutions please)
1 cup white sugar
1 tsp real vanilla
1/2 cup semisweet chocolate chips
1/4 cup toasted sliced almonds or toasted pecan pieces
Before you start place a sheet of foil on a baking sheet and butter it lightly. Get your nuts and chocolate ready to go. You will have no time to go looking for stuff once the candy sets.
Use a heavy bottomed saucepan and a whisk or wooden spoon. I have used silicone spatulas for stirring also. I hear now and again that you should only use a wooden spoon but I have had success with most utensils. If you use a plastic spoon make sure it won't melt or you will get yucky plastic streaked candy.(yep learned that the hard way....)
Melt the butter over medium high heat. Everyones stove is different so watching your candy from start to finish is critical. Add the sugar and vanilla. Boil your candy until it reaches 290 degrees on a good candy thermometer. That will take anywhere from 4 to 6 minutes depending on the heat. Stir constantly or it WILL scorch. It should start turning a beautiful light tan colour just before its done.
Once its reached temperature pour it out onto your buttered foil.
After a minute or so sprinkle your chocolate chips on top of the toffee. After it melts a bit spread the chocolate smooth with the back of a spoon or a spatula. Sprinkle your nuts on top. Let it cool completely.
Break into pieces and enjoy!
Sunday, December 21, 2014
Tuesday, September 23, 2014
What's cooking on Tuesday?
It's a beautiful fall day here. I have the doors open wide for a delicious crisp breeze.
I am catching up on some basics I didn't get to last weekend because everyone was sick. My son has been on a burrito kick so he went through all my refried beans. I brought a big pot of beans and water to a boil last night. After it boiled a minute, I drained and rinsed the beans. Throw them in the crock pot on low overnight and voila! fresh cooked beans. I used the beans in this recipe today to put up in freezer containers.
3 cups cooked beans ( I used an assortment of reds)
4 TB butter
1/2 C water or milk
1 tsp onion powder
2 tsp garlic powder
3 tsp cumin
2 tsp paprika
2 tsp salt
1 tsp chili powder
1 tsp black pepper
Melt butter in a large pot. Add in beans, spices, and water.
Mix well and simmer on medium low heat for 15 minutes or so.
You can run a hand mixer, immersion blender, or old fashioned potato masher to smooth it out if you don't want so many chunks. This recipe is a bit spicy, add less seasonings the first time or experiment to taste.
Pour into pint freezer containers and freeze after they cool completely.
I saw this recipe on The Prairie Homestead and was impressed by their site. I swear we are cooking from all the same recipes!
I am going to serve these beans with homemade flatbreads, corn on the cob, and apple crisp tonight.
Although a brownie recipe is calling my name.............
I am catching up on some basics I didn't get to last weekend because everyone was sick. My son has been on a burrito kick so he went through all my refried beans. I brought a big pot of beans and water to a boil last night. After it boiled a minute, I drained and rinsed the beans. Throw them in the crock pot on low overnight and voila! fresh cooked beans. I used the beans in this recipe today to put up in freezer containers.
Refried Beans
3 cups cooked beans ( I used an assortment of reds)
4 TB butter
1/2 C water or milk
1 tsp onion powder
2 tsp garlic powder
3 tsp cumin
2 tsp paprika
2 tsp salt
1 tsp chili powder
1 tsp black pepper
Melt butter in a large pot. Add in beans, spices, and water.
Mix well and simmer on medium low heat for 15 minutes or so.
You can run a hand mixer, immersion blender, or old fashioned potato masher to smooth it out if you don't want so many chunks. This recipe is a bit spicy, add less seasonings the first time or experiment to taste.
Pour into pint freezer containers and freeze after they cool completely.
I saw this recipe on The Prairie Homestead and was impressed by their site. I swear we are cooking from all the same recipes!
I am going to serve these beans with homemade flatbreads, corn on the cob, and apple crisp tonight.
Although a brownie recipe is calling my name.............
Thursday, September 11, 2014
Banana Snack Cake
Got a pile of ripe brown smooshy bananas on the counter? Those are the best kind! As they ripen the flavor develops and they get sweeter. I have several recipes I pull out but here is todays recipe for an lickity split snack cake for those after school munchies.
1 stick butter or margarine (room temperature)
1 cup white sugar
2 large eggs
1 cup mashed bananas( about 3 medium)
2.25 cups white flour
1/2 tsp baking soda
.25 cup sour cream
1 tsp vanilla
pinch cinnamon
Preheat oven to 350. Grease an 11x7 brownie pan. You could use a 9x13, just adjust your baking time down accordingly.
Using a hand mixer or a whisk and some elbow grease cream together butter and sugar. Add in eggs and mix until creamy. Next stir in the flour, baking soda, and cinnamon.
Lastly whisk in the bananas, sour cream and vanilla.
Pour into prepared pan and bake for 35 minutes. Let cool 10 minutes before cutting.
I serve it plain but we have done frosting and sprinkles, ice cream and maple syrup, as well as peanut butter for toppings. Let the kids pick for a yummy afternnon treat.
To dress this up a bit you could add in a 1/2 cup of pecans, mini chocolate chips, or rum soaked raisins as well.
Banana Snack Cake
1 stick butter or margarine (room temperature)
1 cup white sugar
2 large eggs
1 cup mashed bananas( about 3 medium)
2.25 cups white flour
1/2 tsp baking soda
.25 cup sour cream
1 tsp vanilla
pinch cinnamon
Preheat oven to 350. Grease an 11x7 brownie pan. You could use a 9x13, just adjust your baking time down accordingly.
Using a hand mixer or a whisk and some elbow grease cream together butter and sugar. Add in eggs and mix until creamy. Next stir in the flour, baking soda, and cinnamon.
Lastly whisk in the bananas, sour cream and vanilla.
Pour into prepared pan and bake for 35 minutes. Let cool 10 minutes before cutting.
I serve it plain but we have done frosting and sprinkles, ice cream and maple syrup, as well as peanut butter for toppings. Let the kids pick for a yummy afternnon treat.
To dress this up a bit you could add in a 1/2 cup of pecans, mini chocolate chips, or rum soaked raisins as well.
Thursday, July 31, 2014
Homemade Croutons
These are seriously the easiest thing ever to make and much cheaper than buying at the store. I use them in salads, snack mixes, and the boys like them just as is for snacking. Use leftover bread, bagels, buns, whatever you have.

Homemade Croutons
1 1lb loaf of stale bread
1/4 cup olive oil
1 tsp garlic salt
2 tbs parmesan cheese (optional)
Cut bread into cubes and put in a zip top bag. Pour oil over the bread. Add spices and shake all until coated evenly.
Pour out onto cookies sheet in close to a single layer. Use 2 pans if you have small sheets.
Bake at 350 degrees for 15 minutes. Ovens vary so watch them closely after 10 minutes. They should be golden brown.
Let cool and dig in!
Substitutions here are a breeze. We are dairy free but butter instead of the oil would be yummy. Just melt butter and shake in bag instead of oil. Any dried seasoning works as well. Onion powder, chili powder, italian seasoning, whatever you love.
Tuesday, June 10, 2014
Homemade Condensed Cream of Whatever soup Mix
I found a recipe recently for chicken that uses condensed cream of chicken soup. Recipe sounds good, uses crockpot, really it should be a no brainer. However that little can of soup is almost $2. What? Really?
So I scoured the internet for a recipe and tried a couple. This one came out good, substituted well, and you can make it up as you need it. Best of all, about 50 cents to make or even less.
I have added canned chopped clams or corn and some chopped potatoes for a fast chowder.

2 cups nonfat dry milk powder
3/4 cup cornstarch
2 tablespoons dried onion flakes
1/2 teaspoon ground black pepper
1/4 cup chicken bouillon powder
1 teaspoon dried basil (optional)
1/4 teaspoon dried thyme, more to taste
Using an air tight container combine dry milk, cornstarch, onion
flakes, pepper and chicken bouillon.If desired also add basil and thyme.
I use a widemouth quart mason jar. Mix well.

When using the mix, combine 1/3 cup of the mix with 1 1/4 cups of
water in saucepan. You could use chicken stock, vegetable stock, etc.
Cook and stir until thickened. Makes 1 and a half cups of soup.
So I scoured the internet for a recipe and tried a couple. This one came out good, substituted well, and you can make it up as you need it. Best of all, about 50 cents to make or even less.
I have added canned chopped clams or corn and some chopped potatoes for a fast chowder.
Condensed Cream Soup Mix
2 cups nonfat dry milk powder3/4 cup cornstarch
2 tablespoons dried onion flakes
1/2 teaspoon ground black pepper
1/4 cup chicken bouillon powder
1 teaspoon dried basil (optional)
1/4 teaspoon dried thyme, more to taste
Using an air tight container combine dry milk, cornstarch, onion
flakes, pepper and chicken bouillon.If desired also add basil and thyme.
I use a widemouth quart mason jar. Mix well.
When using the mix, combine 1/3 cup of the mix with 1 1/4 cups of
water in saucepan. You could use chicken stock, vegetable stock, etc.
Cook and stir until thickened. Makes 1 and a half cups of soup.
Monday, June 9, 2014
Cole Slaw
The weather has turned warm and I am tweaking my menus to some inexpensive old favorites again. Cole slaw is ridiculously cheap but still ranks as a food that reminds you of seafood baskets at the oceanside and picnics. Some crockpot BBQ chicken, cole slaw, and garlic toast from the toaster oven and supper is on the table in 5 minutes after a long day outside enjoying the beautiful summer days.
Cabbage is easy to shred and much cheaper to do yourself but even I grab those 8 cup bags of preshredded for $1.99 when they are on sale or its a crazy week. However the dressings that you can buy for cole slaw are very expensive, most around $3.99 for only a few salads worth. The cheap bottles of dressing taste awful and I always just throw some together from scratch.

8 cups shredded cabbage
3 carrots, shredded
1/3 cup sugar
1/2 cup mayonnaise
1/4 cup milk
1/4 cup vinegar
pinch salt
pinch pepper.
Whisk everything but the cabbage and the carrots in a bowl. Toss the dressing with the carrots and cabbage and let marinate/ chill a few hours in the fridge.
Yummy!
Cabbage is easy to shred and much cheaper to do yourself but even I grab those 8 cup bags of preshredded for $1.99 when they are on sale or its a crazy week. However the dressings that you can buy for cole slaw are very expensive, most around $3.99 for only a few salads worth. The cheap bottles of dressing taste awful and I always just throw some together from scratch.
Cole Slaw
8 cups shredded cabbage
3 carrots, shredded
1/3 cup sugar
1/2 cup mayonnaise
1/4 cup milk
1/4 cup vinegar
pinch salt
pinch pepper.
Whisk everything but the cabbage and the carrots in a bowl. Toss the dressing with the carrots and cabbage and let marinate/ chill a few hours in the fridge.
Yummy!
Stuff to do in Central Maine this summer 2014
Schools out for the summer next week and I am planning out the rest of this month's activites for the kids. Here's a few I know of, feel free to share any you like around town too.
Flagship Cinemas offers Camp Flagship, free movies for the kids during the summer months at several locations. The schedule is different at each location, the link is for Auburn. Showtimes are at 10am on Tues., Weds., and Thurs. Check out the schedule, there are some good ones.
http://flagship.retrieversites.com/wp-content/uploads/sites/65/Camp_Flagship_Flyer_2014_AUBURN_1.pdf
This local bowling alley offers a kids bowl free program in Lewiston. Personally we have never been because of sensory issues but a few friends have. While it says kids bowl free I would check it out and make sure shoe rentals etc are not extra. A great way to beat the heat though.
www.kidsbowlfree.com/
One of my boys LOVES berries, any berry really. This small family owned pick your own has the best berries around and is only a 10 minute drive for us. I swear the boys eat their weight in berries before we leave!
http://www.gossberryfarm.com/

A biweekly trip for us is the Maine Wildlife Park, formerly the Gray animal farm. If you haven't been in a few years you will be amazed at the changes. We spend $70 for a family pass that lasts for the entire year at the beginning of the season and go frequently .

They have picnic areas and a small gift shop as well as the Snack Shack with some pretty inexpensive stuff if you are on a budget. Check the calendar at their website for special activities on Saturdays.
http://www.maine.gov/ifw/education/wildlifepark/
A really nice hiking trail just minutes from downtown Lewiston is the Thorncraig bird sanctuary. Theres a pond in the middle and tons of critters for the kids to sneak up on. It's rarely crowded and best of all, free.
http://alltrails.com/trail/us/maine/thorncrag-bird-sanctuary
The Auburn public library has a fabulous children's room. They have pre-assembled activity kits you can check out for a free afternoon of themed activities. I heard a rumor that they have tablets with educational apps preloaded but I haven't checked it out yet. Check their schedule for kids activities throughout the summer.
http://www.auburnpubliclibrary.org/childrens/juvservices.html
When I have a bit of extra money we go to the mini golf and ice cream place out Rt 4. The 18 holes are not very challenging which is nice for my unccordinated family but fun. The ice cream is great here too.
http://roysgolf.com/
Home Depot has a kid's workshop series that can be fun. Sometimes theres a small fee for materials. Definitely check with the store to make sure the website calendar matches theirs though.
http://workshops.homedepot.com/workshops/kids-workshops
A nice swimming hole with short hiking trails is Range Pond State Park. Its a short drive and has had some improvements the last few years. Bring a picnic lunch.
http://www.maine.gov/cgi-bin/online/doc/parksearch/details.pl?park_id=11
 Another short drive is Bradbury Mountain. They have several trails to hike and a small area for picnics as well. Freeport is just up the road for a walk around LL Bean, always popular with my kids. They love the indoor fish ponds. Freeport area has a ton of stuff to do also but we usually avoid too much in town because the urge to shop can be overwhelming!
http://www.maine.gov/cgi-bin/online/doc/parksearch/details.pl?park_id=12
Here's a bunch to get you started. Have fun!
Thursday, April 24, 2014
Cotton Pants for the boys

My boys are growing like weeds and seem to grow an inch every month. I certainly can't afford new pants for them every month so I make tons of pajama pants and shorts. I can make 2 pairs of shorts that fit them perfectly or 1 pair of pants with a yard of fabric.
I have been using a great printable PDF from Hammer & Thread with a little customization for length. Check out her post here.
I have a few sources for inexpensive fabric. We have a local fabric wholesale warehouse that sells fabric cutoffs by the pound and yardage as low as 3.99 a yard. I check there regularly as the bins change often of what is available. I also check our local Goodwill often for .99 mens shirts I can cut down as well as sweatpants for fleece. Last but certainly not least is Joann Fabrics as a good source of novelty prints and denims. I signed up for the sale emails as well as the coupons they mail you. You can double up coupons as long as they come from different sources, i.e. internet, mail, instore. If you time it with a sale you can get great bargains.

I recently made a sizable purchase of fabric from Denverfabrics.com. The specials change there regularly so check back every now and again. I got shirt fabrics at $2.00 a yard as well as a beautiful rose colored knit for me.Very nice quality I must say. Check them out here.
Happy Sewing!
Wednesday, April 23, 2014
Favorite Links
I started a new section today called favorite links over there on the right hand side. I plan to add a few links I find incredibly useful. Take a look, you might find some new inspiration.
Monday, April 14, 2014
Spice of Life (taco seasoning mix)
I am all about the spices. When you are cooking basic inexpensive food spices can fool your mouth into thinking you are dining at a fine restaurant on a mac and cheese budget. My children get spices from the time they can eat table food.
A sprinkle of cinnamon, a dusting of chili powder, or a pinch of pepper can remake the bland into the gourmet.

Here's a basic taco seasoning that you can use on chicken, beef, or even sprinkled over potatoes before you roast them for a smoky flavor.
What spice mix can you not live without?
1/3 cup cumin
1/4 cup chili powder
1/4 cup salt
1/4 cup pepper
2 tsp paprika
1 tsp garlic powder
1 tsp onion powder
1 tsp dried oregano
Mix all together and store in an airtight container. I use canning jars for my spices.
2 Tablespoons is enough to flavor 1 pound of ground beef.
Enjoy!
A sprinkle of cinnamon, a dusting of chili powder, or a pinch of pepper can remake the bland into the gourmet.
Here's a basic taco seasoning that you can use on chicken, beef, or even sprinkled over potatoes before you roast them for a smoky flavor.
What spice mix can you not live without?
Chili Taco Mix
1/3 cup cumin
1/4 cup chili powder
1/4 cup salt
1/4 cup pepper
2 tsp paprika
1 tsp garlic powder
1 tsp onion powder
1 tsp dried oregano
Mix all together and store in an airtight container. I use canning jars for my spices.
2 Tablespoons is enough to flavor 1 pound of ground beef.
Enjoy!
Wednesday, April 2, 2014
Homemade Sweetened Condensed Milk
Every now and again I come across a recipe that includes sweetened condensed milk. which I very rarely have on hand. My friend Caroline gave me this recipe and it works great and saves me a trip to the store.
1/2 c. cold water
1 1/4 c. nonfat dry milk
3/4 c. sugar
Measure water into 2 cup glass container. Gradually stir in milk
powder
until smooth. Microwave on high 3/4-1 minute until milk is steaming
hot. Stir in sugar until dissolved. Allow to cool before using.
Substitutes for 1 (14 ounce) can of sweetened condensed milk.
Homemade Sweetened Condensed Milk
1/2 c. cold water
1 1/4 c. nonfat dry milk
3/4 c. sugar
Measure water into 2 cup glass container. Gradually stir in milk
powder
until smooth. Microwave on high 3/4-1 minute until milk is steaming
hot. Stir in sugar until dissolved. Allow to cool before using.
Substitutes for 1 (14 ounce) can of sweetened condensed milk.
Fast Apple Coffeecake
Ever need to throw a cake together for company at the last second or need to feed a couple extra kids at snack time?
This cake is super fast and easy and sure to please.
Upsidedown Apple Coffee Cake
1 18 oz. cake mix, prepared according to pkg. directions
or use your favorite homemade recipe for cake(May use spice cake or white or yellow)
3 - 4 cups Baking apples, peeled, cored and sliced, enough to fill
bottom of baking dish
1/2 cup brown sugar
1/2 cup white sugar
1 teaspoon of apple pie spice(if you use a spice cake mix leave this out)
1 teaspoon of cinnamon
Pre-Heat oven to 350 *F. Grease a 9x13 pan.
Place apples in 9x13 cake pan. Sprinkle with cinnamon,apple spice,
and sugars and
stir to coat. Pour prepared cake mix over apples. Bake according to
directions on cake mix. Cake can be served warm or cold.
ENJOY!!!
Applesauce Snack Cake
I kid myself that I make this for the kids but I really love this cake. Fragrant and yummy, it's a go -to any time of year. I dust it lightly with confectioners sugar or serve with ice cream for a treat.

2 1/2 c. flour
1 1/2 tsp baking soda
3/4 baking powder
1 tsp cinnamon
pinch cloves
1 tsp vanilla
1 tsp salt
1 1/2 c. unsweetened applesauce
1 1/4 c. sugar
1/2 c. vegetable oil
2 eggs
1 c raisins
Heat oven to 350 degrees.
Grease or spray a 9x13 pan.
Beat all ingredients except raisins in a large bowl.
Stir in raisins .
Pour into pan.
Bake for 25-30 mins. .
Cool pan on wire rack.
Cool completely. before cutting..
Serves 16 ( 12 generously)
Applesauce Snack Cake
2 1/2 c. flour
1 1/2 tsp baking soda
3/4 baking powder
1 tsp cinnamon
pinch cloves
1 tsp vanilla
1 tsp salt
1 1/2 c. unsweetened applesauce
1 1/4 c. sugar
1/2 c. vegetable oil
2 eggs
1 c raisins
Heat oven to 350 degrees.
Grease or spray a 9x13 pan.
Beat all ingredients except raisins in a large bowl.
Stir in raisins .
Pour into pan.
Bake for 25-30 mins. .
Cool pan on wire rack.
Cool completely. before cutting..
Serves 16 ( 12 generously)
Tuesday, April 1, 2014
No Bake Cereal Bars
For some reason I am struggling for afterschool snacks these days. I pulled out some old but good recipes and thought this one would be good to share.
It's highly customizable and has easy ingredients. Chocolate chips do not work well, they will melt, but any nut, dried fruit, or hard shelled candy works well.
These are not the best for nutrition, though you can certainly boost it a bit with dried fruit and flax seeds. I can guarantee the kids will love them though and they are insanely easy.
4 C. Cheerios
2 C. Rice Krispies
2 C. dry roasted peanuts
2 C. M & M's
1 C. light corn syrup
1 C. sugar
1 1/2 C. creamy peanut butter
1 teaspoon vanilla extract
I have used a 12x17" jelly roll pan and got about 32
bars. You can use 2 9x13 pans, and make a couple batches.
Yummy!
It's highly customizable and has easy ingredients. Chocolate chips do not work well, they will melt, but any nut, dried fruit, or hard shelled candy works well.
These are not the best for nutrition, though you can certainly boost it a bit with dried fruit and flax seeds. I can guarantee the kids will love them though and they are insanely easy.
No-Bake Cereal Bars
4 C. Cheerios
2 C. Rice Krispies
2 C. dry roasted peanuts
2 C. M & M's
1 C. light corn syrup
1 C. sugar
1 1/2 C. creamy peanut butter
1 teaspoon vanilla extract
In a large bowl, combine the first 4 ingredients, set aside.
In a
saucepan, bring corn syrup and sugar to a boil, stirring frequently.
Remove
from heat;
stir in peanut butter and vanilla.
Pour over cereal mixture and toss
to coat
evenly.
Spread into a greased 15x10x1-inch baking pan. Cool.
Cut into
3x3"
bars. Yield: 15 bars.
I have used a 12x17" jelly roll pan and got about 32
bars. You can use 2 9x13 pans, and make a couple batches.
Yummy!
Wednesday, March 12, 2014
Chocolate Chip Muffins
The boys were home today from school with tummy aches. At about 3 in the afternoon they became ravenously hungry(I am thinking it was a " let's have a Phineas and Ferb marathon" flu). I made them chocolate chip muffins which have been their favorite for as long as they have been eating solid foods. It's comfort food, for sure, and pantry staples to boot, my favorite combination.
2 cups AP flour
1/3 cup white sugar
1TB baking powder
pinch salt
3/4 cup milk
1/3 cup vegetable oil
1 egg
1/2 cup chocolate chips
some extra sugar for sprinkling on top if desired.
Heat oven to 400 degrees F. Line muffin cups with paper liners. I use a muffin top pan I got last year these days. If you don't use liners make sure you grease your pan appropriately.
In a mixing bowl combine the flour, sugar, baking powder, and salt. In a separate bowl whisk together the milk, oil, and egg. Add the wet ingredients to the dry and stir until just moistened(still lumpy is ok). Gently stir in chocolate chips.
Fill muffin tins 2/3 full. Sprinkle tops with sugar if desired. Bake for 20 to 25 minutes, until lightly browned.
Hide a couple if you want one after the kids get ahold of them.
Enjoy!
Chocolate Chip Muffins
Makes 122 cups AP flour
1/3 cup white sugar
1TB baking powder
pinch salt
3/4 cup milk
1/3 cup vegetable oil
1 egg
1/2 cup chocolate chips
some extra sugar for sprinkling on top if desired.
Heat oven to 400 degrees F. Line muffin cups with paper liners. I use a muffin top pan I got last year these days. If you don't use liners make sure you grease your pan appropriately.
In a mixing bowl combine the flour, sugar, baking powder, and salt. In a separate bowl whisk together the milk, oil, and egg. Add the wet ingredients to the dry and stir until just moistened(still lumpy is ok). Gently stir in chocolate chips.
Fill muffin tins 2/3 full. Sprinkle tops with sugar if desired. Bake for 20 to 25 minutes, until lightly browned.
Hide a couple if you want one after the kids get ahold of them.
Enjoy!
Wednesday, February 19, 2014
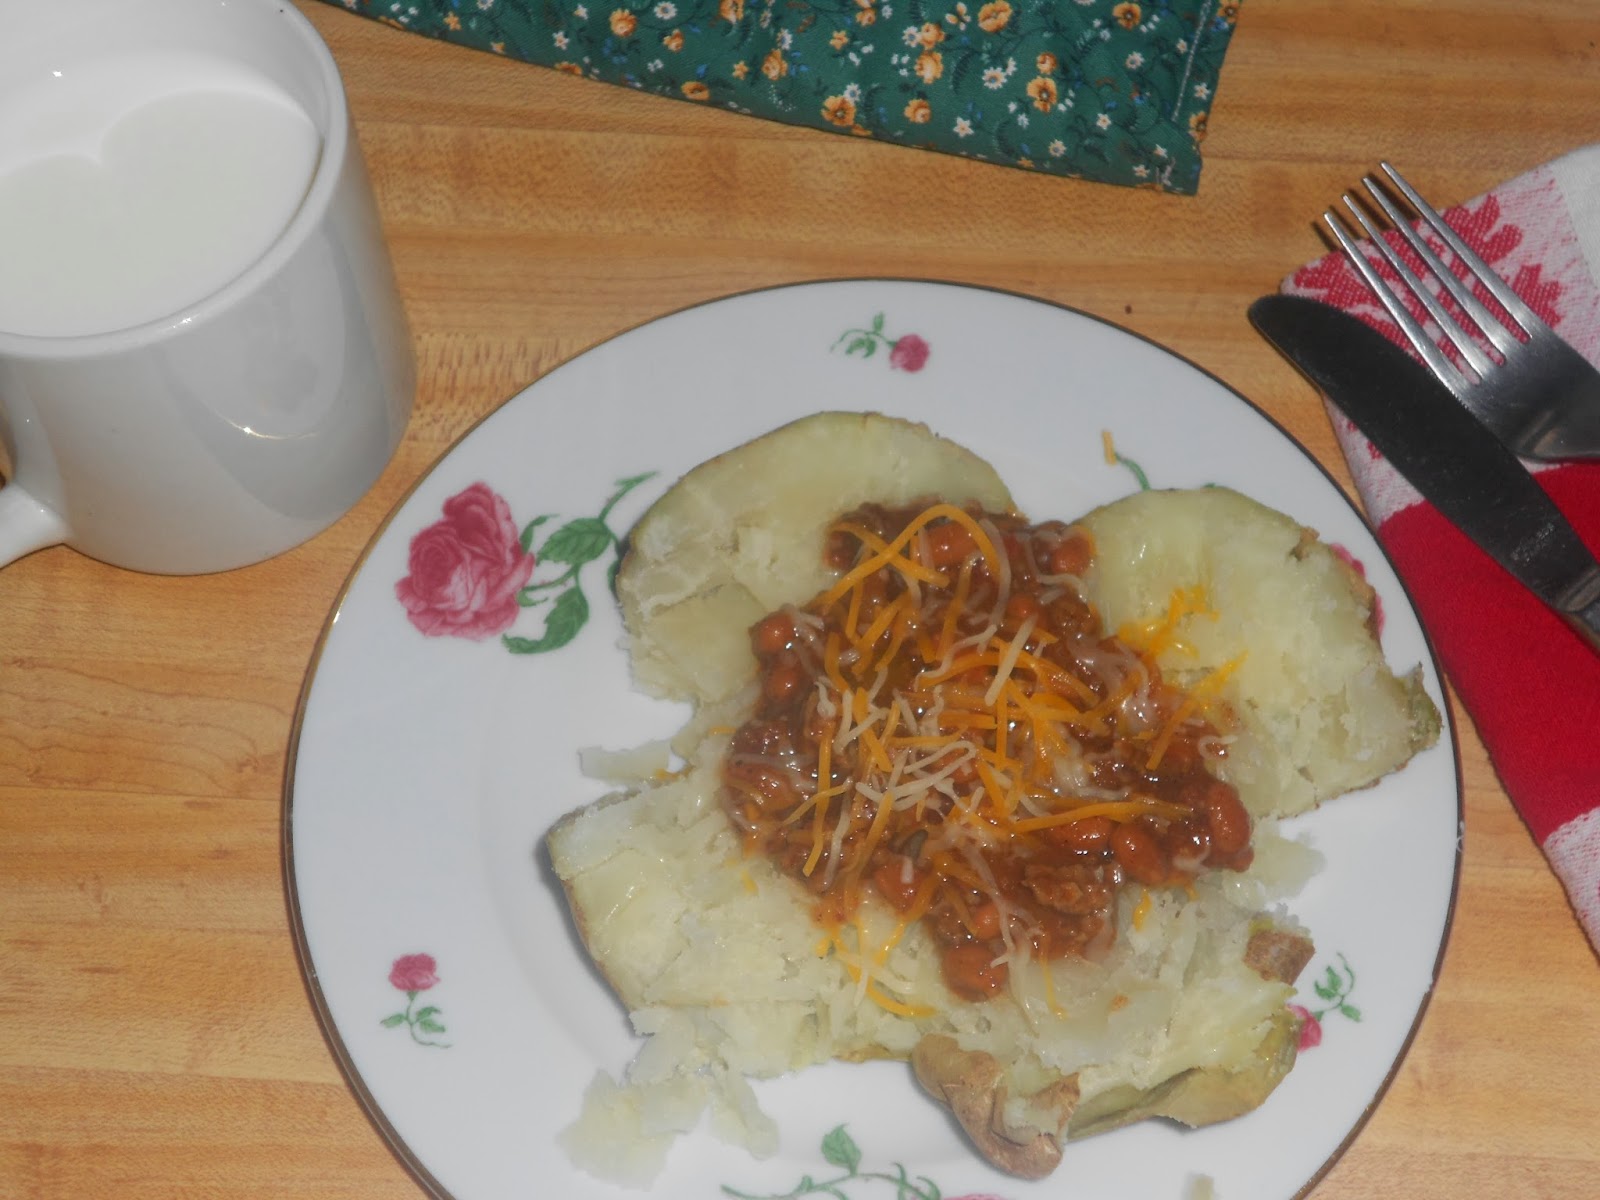
Microwave Baked Potatoes
Every now and again I get on a baked potato kick. They rank up there with pizza and sandwiches for being customizable. Healthy, cheap, and fast, what's not to love?
Fast? Fast? What is she thinking? Some of you may not be familiar with the potato bag. My best friend thought I was nuts when I said I would have baked potatoes on the table in less than 10 minutes. For a wee tiny bit of fabric and batting you can make one of these bags in just a few minutes with very basic sewing skills. Here's a tutorial HERE and HERE.

Yummy dinner! Excellent way to use up leftover bits from supper the night before too.
And by the way, I am sure you could whip up a few extra potato bags for gifts now couldn't you?
Fast? Fast? What is she thinking? Some of you may not be familiar with the potato bag. My best friend thought I was nuts when I said I would have baked potatoes on the table in less than 10 minutes. For a wee tiny bit of fabric and batting you can make one of these bags in just a few minutes with very basic sewing skills. Here's a tutorial HERE and HERE.
Toppings can be as varied as your imagination. Here's some ideas to get you started.
- Ham and Cheese
- Chili ( with or without cheese)
- Salsa and sour cream
- Broccoli and cheese
- Tomato sauce and parm cheese
- Bacon bits, cheese, and sour cream
- Black beans, salsa, and cheese
- Chopped chicken and cheese
- Pesto
Yummy dinner! Excellent way to use up leftover bits from supper the night before too.
And by the way, I am sure you could whip up a few extra potato bags for gifts now couldn't you?
Tuesday, February 18, 2014
Fruit Leather (AKA fruit rollups)
Fruit snacks, must be healthy right? Especially with the labels proclaiming fat free! gluten free! made with real juice! Wrong. Those little packets are basically fruit flavored sugar and preservatives. Don't get me wrong, there is a few brands that are a bit better. But why spend that much money on something you can make yourself that is less expensive, healthier, and only actually has fruit in it?
I have made these since I was a wee sprite and they taste great and hold up well to backpacks and gymbags alike.
Preheat your oven to 150°F (or as low as your oven will go). Line an 11-by-17 cookie sheet with a Silpat baking mat. If you don't have one, use parchment paper, although a Silpat will offer better results.
Wash, dry, and cut up four cups of strawberries (or other in-season fruit of your choice, such as peaches, bananas, or raspberries; frozen fruit works, too). Place in a food processor or blender.
Puree the fruit until completely smooth, about 30 seconds.
Pour the pureed fruit onto the prepared pan. Use the back of a spoon or spatula to spread it out evenly. Carefully slide the pan into the oven, and bake for eight hours (or six to seven hours if your oven is at a slightly higher temperature).
Remove the pan once the fruit is set and still slightly tacky. Be careful not to overcook, as you'll end up with fruit chips instead of fruit leather.
Once the fruit has cooled to room temperature, slowly peel it off the mat or parchment paper. Lay it on a cutting board, and use a knife to cut out 12 portions; store in an airtight container
I have used a dehydrator for these too, especially if you have the solid tray for wet foods. Times vary depending on season and humidity where you are but you will get the hang of it quickly.
I think they taste much much better and are packed with energy and vitamins.
I have made these since I was a wee sprite and they taste great and hold up well to backpacks and gymbags alike.
Fruit Leather
4 c strawberries or whatever fruit is in seasonPreheat your oven to 150°F (or as low as your oven will go). Line an 11-by-17 cookie sheet with a Silpat baking mat. If you don't have one, use parchment paper, although a Silpat will offer better results.
Wash, dry, and cut up four cups of strawberries (or other in-season fruit of your choice, such as peaches, bananas, or raspberries; frozen fruit works, too). Place in a food processor or blender.
Puree the fruit until completely smooth, about 30 seconds.
Pour the pureed fruit onto the prepared pan. Use the back of a spoon or spatula to spread it out evenly. Carefully slide the pan into the oven, and bake for eight hours (or six to seven hours if your oven is at a slightly higher temperature).
Remove the pan once the fruit is set and still slightly tacky. Be careful not to overcook, as you'll end up with fruit chips instead of fruit leather.
Once the fruit has cooled to room temperature, slowly peel it off the mat or parchment paper. Lay it on a cutting board, and use a knife to cut out 12 portions; store in an airtight container
I have used a dehydrator for these too, especially if you have the solid tray for wet foods. Times vary depending on season and humidity where you are but you will get the hang of it quickly.
I think they taste much much better and are packed with energy and vitamins.
Sunday, February 9, 2014
Old- fashioned Sugar Cookies
When I am stuck in the house with the kids every now and again we like to make a project out of baking something. These cookies are easy and delicious and pretty much foolproof. The boys help make the little balls and flatten them. They are smooshing experts, believe me. At holidays we get fancy with different colored sugars to sprinkle on top but usually just a sprinkle of regular white sugar will dress them up.

1 cup butter
1 cup sugar
1 egg
1 tsp vanilla
2 tsp baking powder
3 cups flour
pinch salt
Preheat oven to 375 degrees.
Cream butter and sugar until fluffy. Beat in egg and vanilla.
Add baking powder,salt, and flour 1 cup at a time.
Do not chill dough.
Portion into small balls.
Flatten on ungreased cookie sheet.
Bake at 375 degrees for approximately 8 minutes or until light golden brown.
Let cool a couple minutes before moving to a cooling rack so they don't fall apart.
Not the healthiest snack but the occasional treat is a nice indulgence. Enjoy!
Sugar cookies
makes 3 dozen1 cup butter
1 cup sugar
1 egg
1 tsp vanilla
2 tsp baking powder
3 cups flour
pinch salt
Preheat oven to 375 degrees.
Cream butter and sugar until fluffy. Beat in egg and vanilla.
Add baking powder,salt, and flour 1 cup at a time.
Do not chill dough.
Portion into small balls.
Flatten on ungreased cookie sheet.
Bake at 375 degrees for approximately 8 minutes or until light golden brown.
Let cool a couple minutes before moving to a cooling rack so they don't fall apart.
Not the healthiest snack but the occasional treat is a nice indulgence. Enjoy!
Sunday, December 22, 2013
Handmade Gift Bookmarkers, sweet and inexpensive.
I have a huge button bin that I've been collecting for years. When I found this post I had a serious "AHA!" moment. I made up a handful for some older ladies I know who love to read that I will tuck into their gift bags.
By the way, the blog I found it on is worth at least a half hour of exploring...budget your time accordingly! Visit them HERE.
 Not the best picture on my Android but you get the idea. Very fast and very simple to make and look very luxurious. My 4 year old wants a trip to the button store to make his own after Christmas.
I will try to throw up some blogs with this year's Christmas bag contents. Not having much money never means you can't show your loved ones you care, it just means you have to be more creative! Sounds trite but true. Who doesn't like handmade thoughtful gifts?
I have had several Christmas seasons where I had to use food stamp money to buy cookie making ingredients to make gift bags. Do I let it get me down? Hell no. When they toss that department store gift basket back under the tree and sit noshing on my (best cookie ever!) peanut butter chocolate chip cookies I feel proud and content.
Happy Holidays!
By the way, the blog I found it on is worth at least a half hour of exploring...budget your time accordingly! Visit them HERE.

I will try to throw up some blogs with this year's Christmas bag contents. Not having much money never means you can't show your loved ones you care, it just means you have to be more creative! Sounds trite but true. Who doesn't like handmade thoughtful gifts?
I have had several Christmas seasons where I had to use food stamp money to buy cookie making ingredients to make gift bags. Do I let it get me down? Hell no. When they toss that department store gift basket back under the tree and sit noshing on my (best cookie ever!) peanut butter chocolate chip cookies I feel proud and content.
Happy Holidays!
Tuesday, December 10, 2013
Slow cooked Baked Beans
I find that one of the corner stones of my diet is beans. Seriously. I know you dont believe me because no one eats beans anymore in this fast paced eat out of a can or bag world right?
They are nutritionally a powerhouse. Beans are incredibly filling and inexpensive. While they are not a 5 minute meal they are also incredibly easy to make. Dust off that crock-pot and come make some with me.

1 pound ( about 2 cups) small dry white beans like navy beans
1/3 cup molasses
1/3 cup brown sugar
1/4 cup mustard
1 medium onion, chopped
a pinch of cloves
3 cups hot water
First you have to soak the beans. The night before I put them in a pan and cover with hot water from the faucet before I go to bed. There are other ways you can do it but really to me that's the easiest way to do it. Pick out any floaters and run a spoon through to look for little pebbles too.
The next morning drain the beans. Put half of them in the crock-pot. Place the chopped onion on top of beans. Cover with remaining beans.
In a separate bowl mix together the hot water, molasses, brown sugar, mustard and cloves. Pour over the beans in your crock-pot.
Cook for about 8 hours on low. Check occasionally and make sure beans are covered with liquid. If not, add a bit to cover. When they are tender enough to eat they are done. They may seem a bit soupy at first but will thicken a bit on standing.
The next day they are even better. This recipe will serve 6 as a main dish. I make these once a week and put in canning jars in my refrigerator so I can pull some out for a fast dinner. My teenager loves these on toast, I have them over rice frequently. They are a natural combo with Irish soda bread too.
Now a word about cooking times. There can be huge variances in cooking times depending on how old your beans are. If they have been in your cabinet for a year they may take a couple hours longer. I buy beans every week so they are relatively fresh.
They are nutritionally a powerhouse. Beans are incredibly filling and inexpensive. While they are not a 5 minute meal they are also incredibly easy to make. Dust off that crock-pot and come make some with me.
Slow Cooked Boston Baked Beans
1 pound ( about 2 cups) small dry white beans like navy beans
1/3 cup molasses
1/3 cup brown sugar
1/4 cup mustard
1 medium onion, chopped
a pinch of cloves
3 cups hot water
First you have to soak the beans. The night before I put them in a pan and cover with hot water from the faucet before I go to bed. There are other ways you can do it but really to me that's the easiest way to do it. Pick out any floaters and run a spoon through to look for little pebbles too.
The next morning drain the beans. Put half of them in the crock-pot. Place the chopped onion on top of beans. Cover with remaining beans.
In a separate bowl mix together the hot water, molasses, brown sugar, mustard and cloves. Pour over the beans in your crock-pot.
Cook for about 8 hours on low. Check occasionally and make sure beans are covered with liquid. If not, add a bit to cover. When they are tender enough to eat they are done. They may seem a bit soupy at first but will thicken a bit on standing.
The next day they are even better. This recipe will serve 6 as a main dish. I make these once a week and put in canning jars in my refrigerator so I can pull some out for a fast dinner. My teenager loves these on toast, I have them over rice frequently. They are a natural combo with Irish soda bread too.
Now a word about cooking times. There can be huge variances in cooking times depending on how old your beans are. If they have been in your cabinet for a year they may take a couple hours longer. I buy beans every week so they are relatively fresh.
Thursday, December 5, 2013
Pizza Night

Pizza night is a mainstay in our house. I make dough and I can customize everyone's pizza to their needs. No cheese on one, no sauce on another, all veggies on one is a snap this way. The kids make their own pizzas and we all eat together.
Gluten free came along and threw a wrench in the works though. How do you make a pizza crust without flour? Thank God for the internet and Jeanne at 'The Art of Gluten Free Baking'. She has a great recipe for pizza crust that actually tastes like pizza. I throw the ingredients in the food processor for 20ish seconds and use the parchment for that pizza.I have tried a few premade mixes but darn it they are so expensive. I make up Jeanne's baking mix and make pancakes regularly too from it.
You can find an easy crust recipe here that does have gluten but is dairy free. I will share a secret to make this go very fast. I have been making the dough in the food processor. Put all the ingredients in and process for about 20 to 30 seconds until it's a smooth dough. That's it. Let it rest and use as you would dough you spent 10 minutes kneading. The first time you may have to experiment with time and a drop or two of water to get a smooth dough but after that its easy peasy. If it still looks crumbly add water a teaspoon at a time until the dough comes together, pulsing a few seconds after each admission. I can crank out four crusts in no time this way.
My regular dough recipe makes some wonderful bread sticks as well. Divide each recipe into 8 pieces and roll out thin with your fingers into pretzel rod shapes. Lay flat on cookie sheet. Sprinkle lightly with garlic salt. Let rise for 20 minutes. Bake at 425 degrees for 8 to 10 minutes.
If you aren't dairy free you can smear butter on them and sprinkle with Parmesan cheese for some very similar to the pizza stores. We have them with pizza sauce. Yum!
Wednesday, December 4, 2013
Dinner Time Insanity
So seriously I am considering a dinner time strike. For REAL this time. Dinner time as become more of a challenge than I can deal with some days. Ever try to make one meal that encompasses gluten free, dairy free, vegetarian yet will still manage to please children and the occasional guest? Throw in 2 Autistic kids and whewwww.
My budget is screaming, not to mention the sheer amount of time it takes to make 3 or 4 separate meals every night. All the rules I grew up with about meal time have gone out the window. Feel my pain?
Now that I got that off my chest, I hope in the future to share with you how I manage to get everyone fed. Maybe someone will not feel so overwhelmed and under appreciated. OK that probably won't happen but at least we can commiserate together.
OK I am off to throw some salads and pizza at the heathens. See ya later.
Tuesday, July 23, 2013
Easy Grilled Flatbread
It is 95 degrees out and I have no intention of starting my stove today. Not even the toaster if I can avoid it. A big pile of salad greens and veggies will be the star on my dinner table tonight. Need a side dish to make it a heartier meal? I will be grilling a couple chicken breasts as well as a flatbread for the carnivores.
Super easy and fast. Once you have made these they will be a summer favorite.
2 teaspoons instant dry yeast
2 teaspoons sugar
3 cups AP flour
2 teaspoons butter or margarine
First I'll tell you how I make it, then give you an alternative.
Put warm water in bowl of food processor. Mix in sugar and yeast. Add flour and butter. Process until dough comes together into a nice springy ball, about 2 minutes. Place dough in greased bowl to rise. Let it sit while the grill heats up. I cheat and use an electric grill.
Divide dough into 4 pieces. I use a rolling pin to roll each piece out into a rectangle. If you are feeling brave pull and stretch into shape.
Carefully place dough rectangle onto hot grill and cook for 5 minutes each side. Slather with butter and parmesan cheese for bread sticks or munch plain.
Note: Don't have a food processor or even a grill? No problem. Mix the ingredients for the bread in the same order in a large bowl. Knead about 5 minutes until you have a smooth elastic dough. Sometimes I can talk my kids into doing this while I prepare the rest of supper. After a 20 minute rest, roll out the dough as described above. You can bake in the preheated oven or toaster oven at 450 degrees for about 10 minutes.
I make all 4 flatbreads and use the extra for pizza shells. Yum!
Super easy and fast. Once you have made these they will be a summer favorite.
Grilled Flatbread
1 cup warm water2 teaspoons instant dry yeast
2 teaspoons sugar
3 cups AP flour
2 teaspoons butter or margarine
First I'll tell you how I make it, then give you an alternative.
Put warm water in bowl of food processor. Mix in sugar and yeast. Add flour and butter. Process until dough comes together into a nice springy ball, about 2 minutes. Place dough in greased bowl to rise. Let it sit while the grill heats up. I cheat and use an electric grill.
Divide dough into 4 pieces. I use a rolling pin to roll each piece out into a rectangle. If you are feeling brave pull and stretch into shape.
Carefully place dough rectangle onto hot grill and cook for 5 minutes each side. Slather with butter and parmesan cheese for bread sticks or munch plain.
Note: Don't have a food processor or even a grill? No problem. Mix the ingredients for the bread in the same order in a large bowl. Knead about 5 minutes until you have a smooth elastic dough. Sometimes I can talk my kids into doing this while I prepare the rest of supper. After a 20 minute rest, roll out the dough as described above. You can bake in the preheated oven or toaster oven at 450 degrees for about 10 minutes.
I make all 4 flatbreads and use the extra for pizza shells. Yum!
Monday, July 22, 2013
My Favorite Sweet Pickles

The bins full of pickling cucumbers are starting to show up at the farmer's market. I made my first batch of the season this morning of my favorite sweet pickles, also known as bread and butter pickles. You can't buy the homemade taste of pickles and the recipe is simple. Enjoy!
Bread and Butter Pickles
makes about 3 pints
8 cups of sliced pickling cucumbers
1/2 cup of salt
4 cups vinegar
2 cups brown sugar( I have used white sugar)
1 tablespoon pickling spice
2 inch stick cinnamon
6 whole cloves
1 teaspoon mustard seed
pinch turmeric
Note: If you can't find pickling spice you can make your own. Recipe follows the pickles
Place cucumbers in a large bowl or plastic container. Sprinkle with the salt and cover with cold water. Let stand overnight in the refrigerator.
Drain cucumbers and rinse with cold water.
Combine everything else in a heavy pan. Bring to a boil. Cook over medium heat for 10 minutes.
Add drained cucumbers. Bring back to boil and cook another 5 minutes.
Pack into clean jars carefully and let cool.
Store in the refrigerator.

Pickling Spice
makes about 2 1/2 cups1/2 cup mustard seeds
1/4 cup ground coriander
1/4 cup fennel seed
1/4 cup whole cloves
1/4 cup celery seeds
1/4 cup cinnamon sticks, crushed
1/4 cup black pepper corns
2 tbsp. dried ginger, coarsely chopped
6 dry bay leaves, crushed
Combine all. Store in a cool dry place for up to a year.
I make a fresh batch every year when I start pickling again.
Vegan Chocolate Cupcakes
I am not strictly vegetarian or vegan, however, my diet tends to those foods. I am not afraid of those labels because of that so I frequently try out vegan recipes. Every now and then I find a gem that makes it's way into my every day cooking. These cupcakes are one of those recipes.
My kids loved these. Instead of frosting them I just dust them with powdered sugar. You could be creative and serve with fresh raspberries and whip cream or a decadent fudge frosting.

1 1/2 cups all-purpose flour
1/2 cup sugar
1/3 cup cocoa powder
1 teaspoon baking soda
1/4 teaspoon salt
1 cup strong coffee
1/4 cup grapeseed oil (or canola)
1 teaspoon vanilla
2 tablespoons molasses
2/3 cup vegan dark chocolate chips
Confectioner’s sugar (optional)
Preheat the oven to 350 degrees F. Grease or line a 12-cup cupcake pan.
In a medium bowl, stir together flour, sugar, cocoa powder, baking soda, and salt. In another bowl, whisk coffee, oil, vanilla, and molasses. Pour the coffee mixture into the dry mixture and mix with a wooden spoon until smooth and combined. Do not over beat. Mix in chocolate chips. Place batter evenly into cupcake pans, about 2/3's full. I use an ice cream scoop.
Bake for about 20-25 minutes, or until cupcakes spring back when lightly touched in the middle. Let cool completely in the pan.
My kids loved these. Instead of frosting them I just dust them with powdered sugar. You could be creative and serve with fresh raspberries and whip cream or a decadent fudge frosting.

Vegan Chocolate Cupcakes
makes 12 cupcakes or 24 mini's or 6 texas size
1 1/2 cups all-purpose flour
1/2 cup sugar
1/3 cup cocoa powder
1 teaspoon baking soda
1/4 teaspoon salt
1 cup strong coffee
1/4 cup grapeseed oil (or canola)
1 teaspoon vanilla
2 tablespoons molasses
2/3 cup vegan dark chocolate chips
Confectioner’s sugar (optional)
Preheat the oven to 350 degrees F. Grease or line a 12-cup cupcake pan.
In a medium bowl, stir together flour, sugar, cocoa powder, baking soda, and salt. In another bowl, whisk coffee, oil, vanilla, and molasses. Pour the coffee mixture into the dry mixture and mix with a wooden spoon until smooth and combined. Do not over beat. Mix in chocolate chips. Place batter evenly into cupcake pans, about 2/3's full. I use an ice cream scoop.
Bake for about 20-25 minutes, or until cupcakes spring back when lightly touched in the middle. Let cool completely in the pan.
Parmesan Peppercorn Salad Dressing
90 degree weather has me staying out of the kitchen and wanting the convenience of fast food but on my ramen noodle budget.
Salads are a no brainer. An abundance of cheap fresh produce with a couple homemade sides makes this budget friendly, cool, and healthy.
Whisk together
1 cup mayonaisse
1 cup sour cream
1/2 cup grated parmesan cheese
1/4 cup milk
3 tablespoons lemon juice
2 teaspoons coarsely ground pepper
1/2 teaspoon granulated garlic
Pour into clean glass jar, cover and refridgerate for up to 2 weeks.
Salads are a no brainer. An abundance of cheap fresh produce with a couple homemade sides makes this budget friendly, cool, and healthy.
Parmesan Peppercorn Salad Dressing.
Whisk together
1 cup mayonaisse
1 cup sour cream
1/2 cup grated parmesan cheese
1/4 cup milk
3 tablespoons lemon juice
2 teaspoons coarsely ground pepper
1/2 teaspoon granulated garlic
Pour into clean glass jar, cover and refridgerate for up to 2 weeks.
Tuesday, May 7, 2013
Playroom Storage Stools
Ok I have time to post one more incredibly easy beginners project. The boys pulled the stuffing out of the padding on their 2 year old chairs from their table set. After my recent successes with beginner carpentry projects I starting cruising the web for some easy plans.
Shanty 2 Chic had some wonderful ideas. These stools were perfect minus the wheels. I had visions of toppling stools when they jump on them to sing! The boys picked out their own spray paint colours and had a blast painting them. Three stools took me about an hour minus sanding time.

Shanty 2 Chic had some wonderful ideas. These stools were perfect minus the wheels. I had visions of toppling stools when they jump on them to sing! The boys picked out their own spray paint colours and had a blast painting them. Three stools took me about an hour minus sanding time.

I read all about how easy it is to stain and finish these but I have to admit I am becoming a spray paint junkie. They came out so good and dried so quickly I am considering giving a few other things a facelift. They match their new bookshelves and can be used as more book storage in a pinch as they outgrow them.
I have to say I would never even have considered doing any of these projects if it weren't for these really great instructables and blogs. These authors have been an inspiration to me. Living well on a very small budget is looking easier and easier. I have been looking at goodwill furniture and even junk in the garage with a new eye!
Shelves for Children's Books
You would think I had tons of time right now with all these projects I have accomplished this spring.
Somehow I have managed to actually finish a few projects with the help of some great blogs and instructables.
By necessity we needed a place for the boys books after a new resident took up space on our bookcase. The books have been piled in a laundry basket for 2 weeks when I came across this blog.
Ana White has tons and tons of easy plans for simple furniture and I believe even has a new book out with great ideas as well.
These ledges were my inspiration. I changed the measurements to fit some unused hall wall space right outside the boys bedroom. I only spent $12 for the whole project.

Couldn't have been easier to make. One of these days the wonderful people at Home Depot will not be able to cut my wood and I will have to learn to use a saw. Until then I can put together these fabulous projects in a naptime!
Baking Your Own Bread, Part 2
While looking for those fabulous build your own bed plans I came across this post from the same author.
I read it through twice and was shaking my head in disbelief. No kneading? Little rising? what kind of blasphemy is this? I tried it, fully expecting a horrible loaf that at best would be passable for croutons.

Crispy brown crust and light flaky bread reminiscent of those delicious artisan French bread loaves after a couple of hours! That big bucket of dough made a ridiculously easy pizza dough, a ciabatta for some toasted sandwiches, and a few crusty loaves to serve with salads.
My son even expressed an interest in making it and was so proud of his first loaf. We left a bit of dough in the bucket for the next batch and got a beautiful sourdough flavor. I am thinking about getting that book the next time I have found money burning a hole in my pocket.
Aeray, seriously, why did you have to be already married.............
Easy Bed Frame to Build
SO my bed frame broke.....yeah, one too many jumps from one of the boys (yes you Nicholas). I went to look at bed frames at a few stores and came to the conclusion that I did not have over $200 to spend on a new one. I store a ton of stuff under my bed so mattress on the floor was not really an option.

I googled bed frames plans and Holy Cannoli there's a pile of them. The one that caught my eye was " Cheap Easy Low Waste". Much Thanks to the author for this fabulous plan!

For $72.50 I built a queen sized bed and repurposed my headboard. Woohoo! The really bored guys at Home Depot cut my wood so essentially I just had to predrill holes and screw the pieces together.
 An unintended side benefit was that this bed takes up much less space, at least visually if not in actuality, so my room seems much bigger.
I am working on my saw phobia and plan to do a few more projects. My scrap pile is growing and I have bookmarked a few pages.
The low cost is wonderful and I am so pleased with myself. Yay!

I googled bed frames plans and Holy Cannoli there's a pile of them. The one that caught my eye was " Cheap Easy Low Waste". Much Thanks to the author for this fabulous plan!

For $72.50 I built a queen sized bed and repurposed my headboard. Woohoo! The really bored guys at Home Depot cut my wood so essentially I just had to predrill holes and screw the pieces together.
This baby is incredibly sturdy and comfortable besides. I still have my storage space as well.
 An unintended side benefit was that this bed takes up much less space, at least visually if not in actuality, so my room seems much bigger.
I am working on my saw phobia and plan to do a few more projects. My scrap pile is growing and I have bookmarked a few pages.
The low cost is wonderful and I am so pleased with myself. Yay!
Tuesday, March 12, 2013
Starting the Garden and Dreaming of Spring
With the first warm weather I start dreaming of fresh salads and fruit desserts bursting with berries......
I have already been spending silly amounts of time at the seed racks picking out this years crops. Why do they sell all these seeds that don't have a prayer here unless you start them 2 months early and have a green house, cold frames, and a green thumb? I am going to be much more realistic this year.
I don't want to do all kinds of crazy seeds for plants that will never ripen in our short growing season here in Maine. I am going to concentrate on the basics this year. The stress of tiny pumpkins, green beefsteak tomatos and stunted melons is too much for me. I found a fabulous pick your own nearby for all kinds of berries so I am giving up on my rabbit ravaged strawberries too.
Spinach, lettuces, peppers, herbs I actually use, cucumbers, and grape tomatoes will be the largest crops I think. I want to do an entire small raised bed of carrots this year. Last years were sweet and crunchy and I got 2 crops even here. I've never done potatoes but I think I want to try them this year, if for no other reason than a learning lesson or the kids. I've heard they are very easy and hard to kill.
Coriander, dill, and cilantro are out, while double plantings of basil. thyme, rosemary and oregano will be fragrant and grace many of my dishes. I dont know why I always think I will start suddenly canning vast amounts of dill pickles but plantings of dill were always part of my routine. Why? Probably because of those fabulous pictures in gourmet and gardening magazines of beautiful feathery plants.
I saved my plastic milk jugs all winter and this weekend will poke small drainage holes and cut an opening from the top of each one, leaving the handle intact. These improvised pots will then grace my back deck hung with twine. Three times the space, much cheaper than pots, recycled, and easy care, what's not to love!? The kids are already thinking up what they will decorate the pots with too, so fab art projects as well.
If you aren't already doing it, rethink composting. It's really easy. The rich organic material you get is a great way to save money on fertilizers and in my opinion your veggies will be that much stronger and delicious. At our house its just a pile out behind the garage that I dump all our kitchen refuse and turn once in a blue moon. I'm sure there are much better ways but it works for me.
Revisit the roasted veggies and soup recipes before it gets too hot for these favorites. Salad days are almost here!
Monday, December 24, 2012
Happy Holidays! My Gift Basket Ideas
I have been making my gift baskets this year and have been much too busy to post. I hope to list and link everything after the new year to give some ideas for next year. I feel pretty safe listing because no-one in my extended family ever reads this! I also made these adorable little recipe books but I'm hung up on which to include so those may not get out.
I wanted to say a word about those computer printing programs for making cards, labels, etc. I personally use Printshop. They may seem expensive to buy but they are essential if you are making gifts from scratch. Labels for your jars, gift tags, cards, and all kinds of other neat things are incredible easy. If you factor how much you get from these programs in, it's worth it.
I use the local Dollar store for 90% of my packaging. They have tons of great packaging and decorations for little money.
I hope everyone is healthy and happy and will have much fun in the new year!
The Aunt's Basket
French Vanilla Coffee Mix (in a jar)
Scone mix
2 boxes of tea from my grocery store
Candied Orange Peel
Cinnamon Sugar Biscotti
Uncle David's Basket
BBQ sauce
Spicy Rub
Double Fudge Brownie Mix (in a jar)
Peanut Brittle
Peanut Butter cookies
Uncle Peter's Basket
Handmade Laundry Soap
Reusable Cloth Produce bags
Lavender sugar scrub
Double Fudge Brownie mix(in a jar)
reusable travel coffee mugs
Homemade Granola
Monday, December 17, 2012
Candied Orange Peels
I remember these little tidbits from when I was a kid but had totally forgotten them. I came across a recipe for scones with them and decided to check out making them. They were very easy and came out perfect the first time. I just made a huge batch for Christmas presents. I've seen them dipped in chocolate on my web forays for recipes, yummy!
Candied Orange Peels
3 oranges
2 cups sugar
2 cups water
extra sugar for dipping, I used about 1 1/2 cups
Peel oranges carefully. Cut peel into small strips. Using a paring knife remove extra pith from peels(the bitter white part). Leaving a little is OK. They don't have to be perfect.
Place peel in a saucepan in cold water to cover. Bring to a boil. Drain off water and repeat process with cold water. Do this a total of 3 times to ensure your finished product has no bitterness. Set aside. DO NOT SKIP THIS STEP.
Bring water and sugar to a boil in saucepan. Add peels and turn heat to medium low, just barely a low boil. Simmer for as long as it takes for peels to become translucent. Mine took 50 minutes, I had read it could take as little as 30 minutes or as much as an hour. Keep an eye on them after 30 minutes.
Working fairly quickly roll peels in sugar and lay out on either wax paper or racks set over cookie sheets(to catch drips). Let dry completely. 4 hours is what most people said, I let mine sit for a couple hours and they were fine.
Package in pretty jars or tins. I think these are delicious eaten the way they are but they really kick up a nice batch of scones. These below were dipped in the sugar.
Thursday, November 22, 2012
Grilled Cheese Sandwiches
There's a reason grilled cheese sandwiches are a classic. Crispy and buttery outside, rich and melted inside......how can this budget pleaser go wrong? Vegetarians everywhere who eat dairy are cheering!
I use homemade bread for these but a store bought loaf will do.
Grilled Cheese Sandwiches
8 slices bread
8 slices cheese, either American or Cheddar
1 TB butter.
Start heating up a fry pan or griddle over medium high heat.
Melt butter on pan.
Place 4 slices bread on pan.
Layer 2 slices of cheese on each slice of bread.
Top with second slice of bread.
Fry on one side until crisp and golden, then flip.
Fry second side until crisp and golden.
Serve with carrots sticks and sliced apples.
Variations
Add a slice of ham or turkey.
Spread Mustard on bread before cheese goes on.
Thin slices of apple sandwiched in with the cheese(my fave).
Thin slices of tomato added with the cheese on mayo.
Healthier Peanut Butter Cookies
I make peanut butter cookies for the kids on Thanksgiving. They don't like pies and can carry them around while they are playing. Who doesn't like cookies?
I've been on the healthy eating bandwagon lately. The argument I hear most is the 'I don't have the time or money' excuse. I usually come back with the fact that a lot of little changes will make a big difference. So I have been tweaking some of my traditional favorites. Here's a new version of my Thanksgiving peanut butter cookies. The kids loved them and I had to slap away a few adult hands as well.
Healthier Peanut Butter Cookies
1/2 cup (non transfat please) margarine
1/2 cup peanut butter
3/4 cup brown sugar
1 large egg
1/2 tsp baking soda
pinch cinnamon
pinch salt
1 1/4 cup quick rolled oats ( not steel cut)
3/4 cup whole wheat flour
Preheat oven to 350 degrees.
Cream the sugar, peanut butter, and margarine until smooth.
Add egg, soda, salt and cinnamon.
Stir in the oats and the flour. The dough will be thick.
Drop by spoonsful onto an ungreased cookie sheet.
Bake at 350 degrees for 10 minutes.
Let cool. Makes about 2 dozen depending on how big they are.
Basic Bread and French Toast Sticks
My local bakery thrift store closed on Wednesday. It saddens me for a few reasons and even makes me angry to see the employees I have known for many years lose their jobs a few weeks before Christmas and the day before Thanksgiving.
I'm digging out some bread recipes to try to keep my budget from being totally destroyed. Here's a couple basics that are tried and true in my house.
White Sandwich Bread
3 cups AP flour
2 Tsp active dry yeast
2 Tb sugar
pinch salt
2 Tb butter
1 1/4 hot water
Dissolve the yeast and sugar in the hot water and let sit while you get the rest together.
Put flour and salt into large mixing bowl. Add butter, which you have cut into little pieces. Dump in the yeast mixture. Stir until a dough forms.
Sprinkle some flour on a counter or table top. Knead the bread dough until smooth and elastic, about 10 minutes. On humid days I find the dough a little sticky, just knead in a bit more flour until its workable.
Shape into your preferred loaf shape and place in a pan( I make a traditional egg shape and put on a flat 1/4 sheet pan).You can use a standard loaf pan if you prefer.
Let rise until doubled. Bake at 375 degrees for 30 minutes for a nice crusty outside.
Let cool on a cooling rack before slicing or you will have a mess. I use an electric knife for easy even slices.
Makes 1 standard sandwich loaf, about 1 1/2 lb
Note: for electric breadmakers put your ingredients in your maker in the order specified by the manufacturer. For my maker its the water mixture followed by the flour and salt topped with the butter.
French Toast
3 eggs
1 cup milk
1 tsp vanilla
pinch cinnamon
pinch nutmeg
6 slices slightly stale bread
optional: maple syrup, jelly, whipped cream and berries
Whisk together all ingredients but the bread and optional ingredients. I cut my bread pieces into thirds to make french toast sticks for the kids. Soak bread in the milk mixture for a few minutes while your griddle or frying pan heats up. I put the bread in a ziptop bag and pour the egg mixture over it. Close the bag and let it sit on the counter. Turn it over after a minute or two.
I use a pat of butter or a dollop of canola oil to grease my pan which I have heated to medium high. Fry your bread slices until nice and golden on both sides.
I heat up a bit of strawberry jam on the stove until its melted then use that for syrup usually. Maple syrup is awesome also, though very pricey here. Be creative!
Tuesday, September 4, 2012
Shepherd's Pie ( 2 kinds)
Shepherd's pie is a classic around here. Everyone has some version of it and I have seen it called a few different things. Here I have 2 versions, a meat lovers and a veggie one. These casseroles are great for batch cooking. I try to always make 2 and freeze the extra one for a crazy day supper. Very inexpensive, hearty and delicious, this is one of my favorite casseroles. I serve it with some carrot and celery sticks.
I buy burger once in a blue moon on sale and cook, storing 1 pound portions in quart freezer bags in my freezer. To freeze made ahead casseroles, line your baking dish with foil. After the dish has frozen, lift it out and over wrap with more foil. Don't forget to write on it what it is and the date!
1 cup salsa
1.5 cups whole kernel corn
6 large potatoes
4 TB butter
1/2 cup milk
salt and pepper to taste.
gravy(optional)
Quarter the potatoes, cover with water and put on to boil. I don't peel mine but you can if you wish. Boil until soft and mashable. Add the butter and milk. Mash out any of the lumps. Set aside.
In a 9x9 baking dish put the cooked burger across the bottom. Spoon the salsa over the burger. Next layer is the corn. I buy the big bags of frozen corn at the wholesale club. Spoon the mashed potatoes on top and sprinkle with salt and pepper to taste. Heat in a 375 degree oven for about 20 minutes.
If you want to, you can serve with gravy. Everyone has their own thoughts on gravy, packets, cans, jars or, if you are really brave, homemade. I don't serve gravy but my mother-in-law always does.
1 small onion, chopped
4 cloves garlic, chopped
6 TB butter
1.5 cups whole kernel corn
6 large potatoes
4 TB butter
1/2 cup milk
salt and pepper to taste.
In a medium saute pan melt the 6 TB butter. Add the onions, mushrooms and garlic. Cook another few minutes until mushrooms have reduced and are starting to brown. Remove from heat.
Quarter the potatoes, cover with water and put on to boil. I don't peel mine but you can if you wish. Boil until soft and mashable. Add the 4 TB butter and milk. Mash out any of the lumps. Set aside.
In a 9x9 baking dish layer the mushroom mixture in the bottom. Next is the sweet corn. Lastly is the mashed potatoes. Sprinkle with salt and pepper to taste. Heat in a 375 degree oven for about 20 minutes.
I buy burger once in a blue moon on sale and cook, storing 1 pound portions in quart freezer bags in my freezer. To freeze made ahead casseroles, line your baking dish with foil. After the dish has frozen, lift it out and over wrap with more foil. Don't forget to write on it what it is and the date!
Hamburger Shepherds Pie
1.5 lbs Hamburger, cooked and crumbled1 cup salsa
1.5 cups whole kernel corn
6 large potatoes
4 TB butter
1/2 cup milk
salt and pepper to taste.
gravy(optional)
Quarter the potatoes, cover with water and put on to boil. I don't peel mine but you can if you wish. Boil until soft and mashable. Add the butter and milk. Mash out any of the lumps. Set aside.
In a 9x9 baking dish put the cooked burger across the bottom. Spoon the salsa over the burger. Next layer is the corn. I buy the big bags of frozen corn at the wholesale club. Spoon the mashed potatoes on top and sprinkle with salt and pepper to taste. Heat in a 375 degree oven for about 20 minutes.
If you want to, you can serve with gravy. Everyone has their own thoughts on gravy, packets, cans, jars or, if you are really brave, homemade. I don't serve gravy but my mother-in-law always does.
Portabella Shepherd's Pie
16 oz package of baby portabellas, quartered1 small onion, chopped
4 cloves garlic, chopped
6 TB butter
1.5 cups whole kernel corn
6 large potatoes
4 TB butter
1/2 cup milk
salt and pepper to taste.
In a medium saute pan melt the 6 TB butter. Add the onions, mushrooms and garlic. Cook another few minutes until mushrooms have reduced and are starting to brown. Remove from heat.
Quarter the potatoes, cover with water and put on to boil. I don't peel mine but you can if you wish. Boil until soft and mashable. Add the 4 TB butter and milk. Mash out any of the lumps. Set aside.
In a 9x9 baking dish layer the mushroom mixture in the bottom. Next is the sweet corn. Lastly is the mashed potatoes. Sprinkle with salt and pepper to taste. Heat in a 375 degree oven for about 20 minutes.
Thursday, August 30, 2012
Appliances that will save you money
There is no doubt about it, our lives today are hectic when you have kids. Soccer practise, debate club, PTA meetings and a ton of other activities we work into already full days. My life is just as insane if not more so. These appliances can be life savers for getting an inexpensive dinner on the table.
All of these can save you money and make it less likely to grab either drive through food or convenience foods that are expensive and unhealthy. Rethink your preparation and dishes and you may be pleasantly surprised at how cheaply you can get fast nutritious food on the table.
Breadmaker
Breadmaker? What? How does that get dinner on the table you ask? I use mine a couple times a week to make pizza dough. I through everything in, set it on dough and run out the door to whatever activity we need to go to. When we get home I have dough waiting to be stretched and thrown in the oven. Voila! A 20 minute pizza when we get home for a fraction of the cost. Before you complain about the high cost of a breadmaker let me tell you I have 3 breadmakers that I got at my local Salvation Army store for $5 each. They were missing manuals but I never read those anyway. One of them is a $200 machine with enough buttons to be in the space program. I visit my local thrift store once a month on half price days just to poke around and frequently find something dirt cheap and useful.Rice Cooker
Another machine that I love is my rice cooker. What can be cheaper than rice? My rice cooker runs 4 or 5 times a week for both side dishes and main dishes. My favorite main dish that I make in it is Chinese Rice. Rice, frozen mixed vegetables, burger crumbles( or precooked hamburger for you carnivores), vegetable broth and 20 minutes of watch free cooking and I have a fast beef rice dish on the table while I try to finishing writing a paper or folding laundry. I also make a big pot of plain rice once a week I portion into quart freezer bags and freeze for super fast stir frys and mexican dishes, as well as a rice dish I make for breakfast on the weekends. I did buy my rice cooker new for about $20 on Amazon.Crockpot
What's not to love? Throw food in your crockpot in the morning and come home to a great smelling house and instant supper. Mine gets heavy use for cooking a large batch of chicken legs for chicken meat for other dishes, chili or beans for Mexican dishes, various soups and chowders. We love corn chowder, another inexpensive dish that is heavenly in the winter. Just add the milk or cream a few minutes before serving so it doesn't curdle during the long day of simmering. Chances are you have a crockpot in a box somewhere your mother gave you for Christmas a few years ago. Dig it out, I promise you will love it.Food Processor
Bread crumbs, mixing spice blends, chopping veggies for salsa, slicing onions for onion soup, making quick work of slicing chopping all kinds of veggies....... enough said!!! Mine gets daily use and is easily cleaned in the dishwasher. Pesto, salad dressings, mixing up homemade biscuit and cake mixes, making homemade gourmet coffee mixes, there is a ton of things you can do with it to save time.All of these can save you money and make it less likely to grab either drive through food or convenience foods that are expensive and unhealthy. Rethink your preparation and dishes and you may be pleasantly surprised at how cheaply you can get fast nutritious food on the table.
Subscribe to:
Posts (Atom)